Saturday, July 7, 2012

Project 3 WIP

In order to create an animation, it is important to have a storyline first. My idea of presenting the animation is by showing a family is living happily inside the house. A song had been chosen when i start imagining the storyline.


Here;s the storyline:
1. An overall view of the exterior
2. The most interesting part of the building - living room
3. Light and shadow caused by the movement of sun.
4. Family reunion
5. Go to bed and sleep

WIP
With the knowledge learnt in project 1 and project 2, a few improvements had been added.

Camera path had been set in various interesting angles.


Every scene is saved so that I could render them when I have a lot of free time, such as when I was sleeping.


Before I start rendering, it is important to decrease rendering time. This tutorial helps me a lot.http://comp-apps2.blogspot.com/2012/05/reuse-fg-map-rendering-time-saver.html

It took me a lot of time to render the animation.


Cycberlink PowerDirector is used to join the video. Transitional effect and titles are added.


The video is then rendered and here is the final outcome.


Friday, July 6, 2012

MISSION ACCOMPLISHED! PROJECT 3 VIDEO RENDERING

I am very happy with the product. =D WIP will be up as soon as possible. Time for chill~


Enjoy =)

Thursday, June 14, 2012

WIP for Project 2

Before trying to render with 3dsmax, I actually tried rendering with Sketchup. I always love the simplicity of using Sketchup =) Here are some test render.


Alright, stop messing with Sketchup. Lets render with 3dsmax for more challenges.

1. Assigning material in the model. Experimented quite a lot on it. I found that using bitmap with bump will be much more realistic.


UVW map and gizmo is used to make the texture much more realistic.

2. I have been struggling with the daylight system as it makes my 3d render very fake. However, when I have solved the problems, I was overjoyed with the effect. Test render below.


After adjusting the sunlight.


3. Adding in furniture. More materials are assigned on them.


4. Lighting effect is added. IES light is used in some light.


First time added light. Trial and error until I am satisfied
with the effect.


5. Camera is used to capture the view inside the building. Played with wide lens.


7. Images I rendered before editing with photoshop.


Project 2: Still Rendering with Materials, Lights, Camera Views with Site Context


Completed works for this assignment. =)

Sunday, May 20, 2012

Project 2 - Rndering the exterior


I tried exploring with the materials in 3dsmax today. Here is my outcome:

I tried to add grass inside. But i think it failed badly.
It also took a long time to render the grass.

WORK IN PROGRESS
1. I used Autodesk concrete to my wall and roof, not knowing how it would work. It turns out quite good and I feel quite satisfied with it.

2. The frame of the window is rendered with Autodesk Metal. Anodized aluminium is chosen. Effect is quite good.

3. Glass is rendered with Arch and Design.

4. The grass is rendered with Hair and Fur Modifier. The results is bad and it took a long time to render. Still searching for a better way to render the grass.

Monday, May 7, 2012

3DSMAX for modelling

This is totally a different experience for 3dmax! It is much more complicated than sketchup and it takes me quite some time to get used to it. Thanks to my friends for showing the way. I am glad that I have tried and learnt 3dmax to build the model.

Here's the progress of me using 3dsmax~

The curved wall and the site contour that I did in sketchup is maintained as it is quite complicated. 

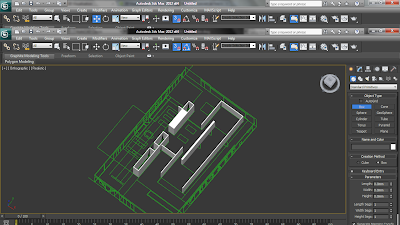
Importing Autocad drawing into 3dmax. Follow the instructions which Mr.Koh has posted. :)

Drawings successfully imported!

Detach the drawings.

Rotate and arrange the drawings as guide.

Internal walls are built using box tool.
Openings on the wall is created by using Boolean tool.

Column by the side is built by using box tool. They are copied as instance by pressing shift and move.

Combine with the roof that i have hidden.

Border of the window is created using box tool. 

Glass is assigned.

More details are added. 

Test rendering.  Job done! Next mission: interior, site, and photorealistic rendering. :)